Hello Dear Readers,
I just love to have a faint hint of fragrance in every room of my home. The sense of smell is an awesome thing. Think back on any memories you may have of Mom or Grandma baking cookies. How did that smell make you feel- Joyful, happy, hungry? Can you help but smile when you remember this delicious aroma? I know I can't! Fragrance in a room can boost your mood so why not do anything you can do to be happier!
Just ran across something so easy to freshen up a room and boost your moods! Most of us will have everything needed for this little project: small mason jar and ring, scrap of fabric, baking soda, and essential oil. Nothing outlandish or pricey I promise!
Pour baking soda into jar and add 8-10 drops of essential oil. Put fabric scrap on top of jar and screw the ring onto it. Don't use the center disk of the lid. Then just shake to mix the soda and oil. To quickly refresh/scent a room, just give it a shake every now and again!
See....easy peasy, inexpensive, and no artificial anything!
Fragrant Blessings,
Lisa
Showing posts with label Tutorial. Show all posts
Showing posts with label Tutorial. Show all posts
Tuesday, September 26, 2017

Tuesday, February 4, 2014
Making Butter at Home!
As you may have read, I found 2 qts. and 4- 1/2 pints of heavy cream on sale at our local Meijer. I
only paid $3.54 for it. Way cheap! So, what do you do with this much cream? Make butter of course!
So that is what I did. Here is how to make butter at home:
Let cream come to room temperature.
Wash and dry a pint jar. Fill jar until half way full. Put lid and ring on and tighten, then shake the tar out of it.
The jar will fill up with whipped cream --you will hardly be able to feel it shaking inside the jar. Keep shaking! You will be able to feel the cream shaking in the jar again as the butter separates. Keep shaking several more minutes. Empty as much of the butter milk into another container to use for your blueberry pancakes the next day! Then scoop butter solids into a bowl and use a spatula or fork to work the butter and squeeze out all of the buttermilk. Drain bowl frequently using spatula to hold butter in bowl. Run a little water into the bowl and wash the buttermilk out of the butter and squeeze with the spatula. Rinse and repeat! You can add salt now if you want to--optional. Just place in your container and refrigerate or freeze. See, making butter is easy peasy!
So simple but here is a much faster way:

Bring cream to room temp. Pour into bowl of your food processor. I only used a quart at a time so my bowl wouldn't leak. Process cream for several minutes. You will be able to hear the processor bog down when the butter starts to separate. Let it process several more minutes. Pour off buttermilk--save for pancakes remember! Then scoop butter solids into a bowl to work and squeeze the buttermilk out. Wash and repeat several times then add salt. Place into container and viola, you are done-except for the dishes!


I had a total of 3 quarts of heavy cream and I weighed my butter and had just under 3 lbs. I would have had at least 3 lbs. but I dropped a big dollop in the sink. Such a klutz! About 3 lbs. of butter for $3.54! That is some cheap butter! Making butter is so easy, why don't you give it a try? If I can make butter, anyone can make butter!
Blessings,
Lisa
only paid $3.54 for it. Way cheap! So, what do you do with this much cream? Make butter of course!
So that is what I did. Here is how to make butter at home:
Let cream come to room temperature.
Wash and dry a pint jar. Fill jar until half way full. Put lid and ring on and tighten, then shake the tar out of it.
The jar will fill up with whipped cream --you will hardly be able to feel it shaking inside the jar. Keep shaking! You will be able to feel the cream shaking in the jar again as the butter separates. Keep shaking several more minutes. Empty as much of the butter milk into another container to use for your blueberry pancakes the next day! Then scoop butter solids into a bowl and use a spatula or fork to work the butter and squeeze out all of the buttermilk. Drain bowl frequently using spatula to hold butter in bowl. Run a little water into the bowl and wash the buttermilk out of the butter and squeeze with the spatula. Rinse and repeat! You can add salt now if you want to--optional. Just place in your container and refrigerate or freeze. See, making butter is easy peasy!
So simple but here is a much faster way:
Bring cream to room temp. Pour into bowl of your food processor. I only used a quart at a time so my bowl wouldn't leak. Process cream for several minutes. You will be able to hear the processor bog down when the butter starts to separate. Let it process several more minutes. Pour off buttermilk--save for pancakes remember! Then scoop butter solids into a bowl to work and squeeze the buttermilk out. Wash and repeat several times then add salt. Place into container and viola, you are done-except for the dishes!
Working the butter!
My butter and buttermilk!
I had a total of 3 quarts of heavy cream and I weighed my butter and had just under 3 lbs. I would have had at least 3 lbs. but I dropped a big dollop in the sink. Such a klutz! About 3 lbs. of butter for $3.54! That is some cheap butter! Making butter is so easy, why don't you give it a try? If I can make butter, anyone can make butter!
Blessings,
Lisa
Monday, September 16, 2013
Want a garden or a bigger garden? Get started now!

With the world
in the shape it is in, I want to try to be more self- sufficient. What about you? Do you want to be totally dependent on the
grocery stores for your food? In an
emergency, do you want to wait for the Government to rescue you? What would it
hurt to grow more of your own food? It
would be so much healthier and cheaper to grow your own food and make you feel
more secure in the event of a job loss or even in an emergency situation.
So how can you grow more of your own
food? Well, if you are in an apartment,
grow in planters in the window or on your balcony or deck. Many veggies can be grown in containers-there
is even a new Deck Corn seed available at Burpee! Carrots, radish, lettuce, and spinach are
also great container plantings!
If you
have a yard, put space to productive use instead of just having water guzzling grass.
You will have less grass to mow and have more homegrown food. No tiller—no problem! Lasagna or layered beds are so easy! Just cover the ground with layers and layers
of wet newspaper, then layer straw, compost, leaves, grass clippings, egg
shells, and dirt on top. Then
voila! You have a bed of great soil to
use in the Spring for growing your own veggies!
Plant dwarf fruit trees in your front
yard. Just mulch around them and
landscape with flowers or more fruit bushes like blueberries. Plant perennial
rhubarb in a flower bed—it will provide beautiful color and valuable food for
the family. Love Rhubarb and Strawberry Pie! Plant Strawberry plants in a
flower bed—ground cover with a fruit bonus!
Plant peas along a fence for a ready- made trellis for them to grow
on. You are limited only by your imagination(and
maybe zoning rules but that is a story for another day!) Get creative and grow more goodness for your
family!

I challenge you to grow more of your own food
for your family! If you already garden,
increase the size of your garden. If you garden now then get chickens or
rabbits to provide eggs, food, and manure to help with garden production. We can make a difference in our families’
lives, both health wise and budget wise so start preparing now to have more garden space next Spring!
Come on, Let’s Grow Girls!
Garden Blessings to you all,
Lisa
Wednesday, September 11, 2013
Batch Cooking to save time and money!
Hello all,
Cooking once and eating 3 times is a great way to save time and
money! One of my favorite things to
cook in bulk is Pork Tenderloin. I am
able to buy pork tenderloin at our local Meijer for $1.49-$1.89 on sale. When I
find them this cheap, I buy several for our freezer. The crockpot (my favorite appliance) is my
friend in the kitchen! Just put the
whole tenderloin into the crockpot and cook on low for 7-8 hours. You can salt and pepper if you want.

When done, I slice/pull the tenderloin apart.

At this point, you can use it all to make BBQ or take
out several baggies full to freeze for later meals. I add the pulled pork to gravy and serve over bread and mashed potatoes or make pork and gravy with noodles.

Almost no work to get several meals worth of pulled
pork! So cooking once and eating 3 times is a tremendous time and
money saver!
Frugal Blessings,
Lisa
Sunday, January 27, 2013
Project Handmade Christmas
 As a part of my goal to have a less commercial Christmas, I am going to start a series called Project Handmade Christmas. For each craft that I work on for Christmas Gifts, I will document and provide tutorials for them. I hope you find crafts that you like and will want to craft along with me. Let’s stop the Christmas Commercialism Train and hop aboard the movement for a simple Homemade Christmas.
 Handmade Blessings to you all,
Lisa
Wednesday, November 14, 2012
How to make Herbal Firestarters( or How to Use up Sweetgum balls)
It's getting to where most people with fireplaces are going to be using them soon if they are not already! Brrrr....the cold is really bothering me this fall. I found an idea for herbal firestarteres on Pinterest and with a modification, I made a basket of them. I Used what I have an abundance of---Sweet Gum Balls. I do not have any pinecones around so I thought the annoying sweet gum balls work just as well. Now I have a great use for the pesky sweetghum balls that are all over my front yard! Yippee!! Now I just have to pay my neice and Grandaughter to pick them up for me!!
Here are the materials needed:

 Cut one sheetof paper in half and place the herbs and sweetgum balls or pinecones on the end closest to you. Roll up tightly and tie ends with string or hemp. I personally think the hemp string would be just adorable but I didn't want to buy hemp so I used what I had available--crochet cotton.


Here are the materials needed:

Fresh herbs--I cut rosemary and thyme.
String or Hemp rope
Sweetgum Balls(seed pods)
Newspaper-not the shiny ads
Scissors

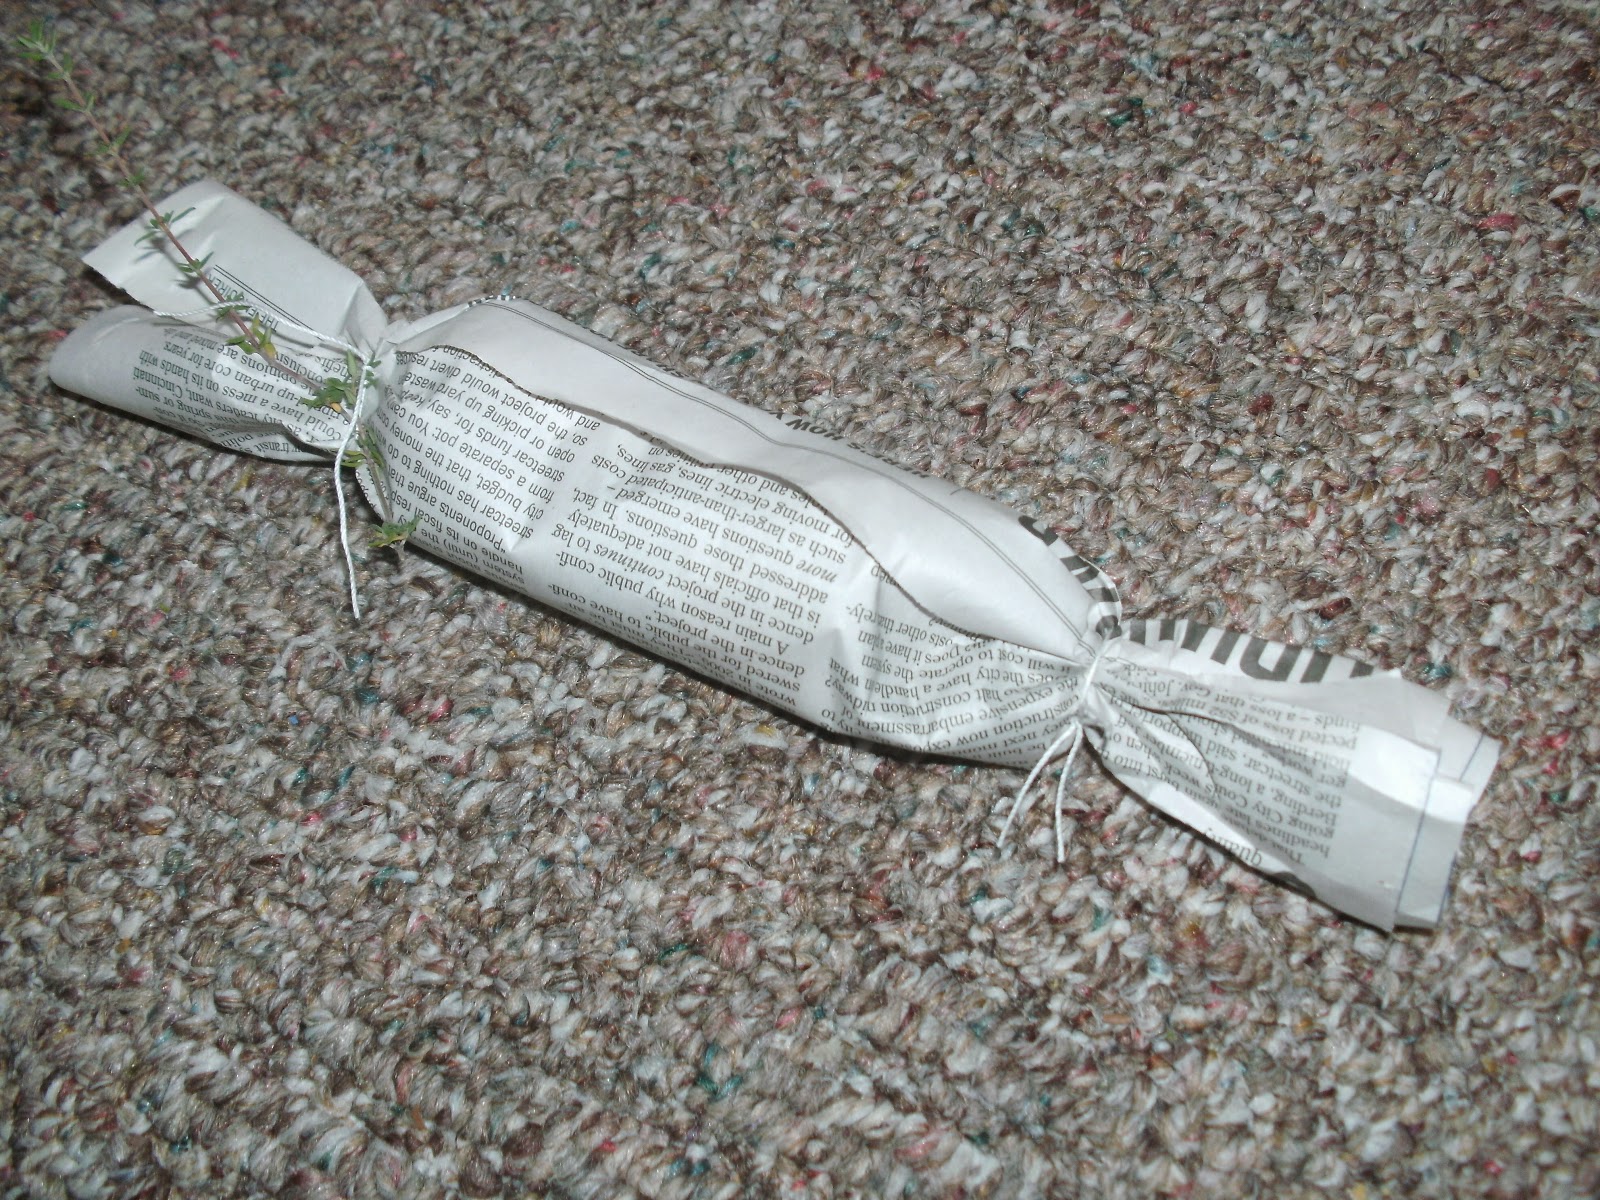
It's hard to see in this pic but I inserted a piece of herb into the one end tie. Adds a little interest!
Here is the basket of firestarters that I made this evening. Only took a little while and is so aromatic.

Even my Hubby thought they smelled nice!
Remember you can use any herb or cinnamon sticks. If you are lucky enough not to have a sweetgum tree in your front yard, you can use small pinecones or even dried twigs. What kind of firestarters do you use?
Warm Blessings to you all,
Lisa
Monday, November 12, 2012
Propagaing a Christmas Cactus

Several years ago, my Mom bought one for me for Christmas because she knew I had always admired them. I couldn't justify spending money on a plant for myself though--money was tight. The blooms were so pretty and festive through the winter that I wanted more of the Cacti for my home. My Mom told me how my Grandma used to just break off a piece and let it dry out a day or two then plant the piece in another pot. She would always have "starts" for anyone who wanted one! Both of my Grandmas had green thumbs--guess that is where I get it from--at least that is what my Mom tells me!
So here are pics of my propagating process:

Several of my Christmas Cacti in the kitchen window. The one on the left is the original one my Momma bought for me. I just counted and I have 9 pots of these beauties in my kitchen and dining room! Told you I love them! :)


Then plant several pieces in a pot together. Water lightly at first and just water once or twice a week after that. The segments may wilt a little but be patient. Less watering is more!
So if you are lucky enought to have one of these beautiful plants, you can easily propagate more. More for your home or like me, more to give away or sell!
Have you propagated any plants lately?
Blooming Blessings,
Lisa
Sunday, October 28, 2012
Great deal on peppers to dry!
Today I found a great brgain at our local Meijer--I bought 9 green peppers for just $2.84. They were in the reduces section but were still in good shape! I bought them up and am drying them to use later.
I am using my Nesco dehydrator and I just love it. Here are pics of the process:

 Wash and slice them into skinny strips. Don't you just love my knife!


I am using my Nesco dehydrator and I just love it. Here are pics of the process:

Here are the last 4 of them--I started before taking pics!


Place on drying racks.

Put lid/fan on and set to 145 degrees and plug in for about 8-10 hours.
Viola! Dried peppers to use all winter long!
Blessings,
Lisa
Saturday, August 11, 2012
Drying more of your pantry stash!
Recently there have been very severe storms here and we have lost power several times. This has had me thinking that I have most of my food storage in freezers. Freezers that run on electricity. Freezers full of food that could be lost in an extended power outage. So, I decided to try to dry more food so that in an emergency we wouldn't lose as much of our stash. I realize the dehydrator takes electric to dry the food but the freezer costs much more to store your foods.
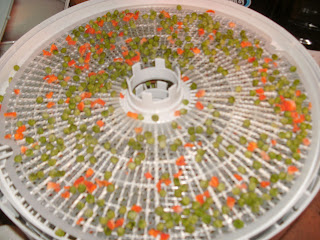
So, for the last few weeks I have been putting my dehydrator to good use. I have been trying to empty out my freezers a bit to make room for meats and I had several bags of frozen peas and carrots Did you know you can dry frozen peas and carrots? It's awesome! No prep work needed! Perfect for busy moms! Drying them is the easiest thing in the world--just let them thaw and then place them on your dehydrator racks and dry on 135 degrees for 6 or so hours. When they have cooled down, just put in glass jars to store. See, I told you, easy peasy! When they go on sale at the super market. do not freeze them--dry them!!
 This is 2 small containers of sliced mushrooms. Easy peasy as well--no prep required!
 I sliced a pound of shortcut carrots I found on sale--this is what they shrunk down to!
Drying your foods is a great way to preserve your stash. Now it can be done with no prep needed at all. It's a win -win! Saves time and money!
Blessings,
Lisa
So, for the last few weeks I have been putting my dehydrator to good use. I have been trying to empty out my freezers a bit to make room for meats and I had several bags of frozen peas and carrots Did you know you can dry frozen peas and carrots? It's awesome! No prep work needed! Perfect for busy moms! Drying them is the easiest thing in the world--just let them thaw and then place them on your dehydrator racks and dry on 135 degrees for 6 or so hours. When they have cooled down, just put in glass jars to store. See, I told you, easy peasy! When they go on sale at the super market. do not freeze them--dry them!!

Peas and carrots almost done!
I also picked up some mushrooms reduced at the market.


Drying your foods is a great way to preserve your stash. Now it can be done with no prep needed at all. It's a win -win! Saves time and money!
Blessings,
Lisa
Tuesday, February 7, 2012
Making Yogurt
Yogurt making is not very difficult at all. It just takes milk and yogurt starter or a 1/2 cup of plain yogurt with active cultures. You can then add sweetner and flavor or fruit after the yogurt is completed.
Here is what you will need to make your own yogurt:
 Yogurt Maker, crock pot, or insulated cooler, milk, quart jar and lid, pan, thermometer, and yogurt starter or culture. I have the Salton Yogurt maker and I really like t. It came with a plastic insert, but I like to use a quart jar because I store it in the same jar.
First, measure out a quart of milk and put into a pan and heat on medium until it reaches 185 degrees.

When it reaches 185 degrees, place pan in a cold water bath to cool it down to 110 degrees. Once it cools to 110, add your yogurt or yogurt starter and stir well. Put the lid on and place jar into your yoghurt maker, crock pot(on warm)or into a cooler with warm water and leave it sit for 8 hours. It needs to stay as close to 110 degrees as possible for the 8 hours. For this reason, I like the Salton yogurt maker--no worries about temps.
 After the yogurt has incubated for 8 hours, take about 3/4 cup out and save the plain yogurt for your next batch. Now you can add your sweetener of choice--sugar, honey, splenda, or maple syrup. Then you can add vanilla flavoring or add fruit. I added Slenda and frozen raspberries to mine. You are only limited by your imagination!
 Now refrigerate and enjoy the next day! Thats it, easy peasy! Mmmmm, I cannot wait to have my raspberry yogurt for breakfast in the morning!
Blessings,
Lisa
Here is what you will need to make your own yogurt:

First, measure out a quart of milk and put into a pan and heat on medium until it reaches 185 degrees.

When it reaches 185 degrees, place pan in a cold water bath to cool it down to 110 degrees. Once it cools to 110, add your yogurt or yogurt starter and stir well. Put the lid on and place jar into your yoghurt maker, crock pot(on warm)or into a cooler with warm water and leave it sit for 8 hours. It needs to stay as close to 110 degrees as possible for the 8 hours. For this reason, I like the Salton yogurt maker--no worries about temps.


Blessings,
Lisa
Sunday, February 5, 2012
Valentines Day Garland

Blessings,
Lisa
Saturday, February 4, 2012
Growing Sprouts
A wonderful way of growing nutritious greens, in the winter, or anytime for that matter, is sprouting!
You can order a sprouter, or use a canning jar with a piece of screen on top in place of a lid. If you use a canning jar, just make sure the screen is tightened down with a canning ring. With the jar, you must must must ensure you drain the sprouts well.
I ordered my Easysprout and seeds from The Sprout people. http://www.sproutpeople.com/
They offer a great selection of sprout products and seeds.
 Sprouting seeds is so easy. The most important thing to remember is to clean your sprouter or jar well and to rinse with a bleach water solution(1T bleach to a pint of water) between each use.
1. Rinse your seeds until the water runs clear.
2. Soak seeds in your jar or sprouter for 12 hours

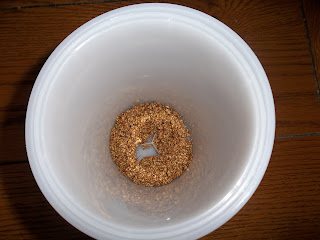
4. Rinse every 8-12 hours and drain well for the next 4-6 days
 Day 6--All done!
That is it. So easy! If you want to get the hulls off, just soak sprouts in a bowl full of water. Break up mass of sprouts and skim hulls off of top. Drain and let dry before putting into fridge. Make sure they are very dry! There you have it--a fresh nutritious green sprout in just 4-6 days.
Hope you are inspired to try this easy way of providing fresh greens for your family!
Blessings,
You can order a sprouter, or use a canning jar with a piece of screen on top in place of a lid. If you use a canning jar, just make sure the screen is tightened down with a canning ring. With the jar, you must must must ensure you drain the sprouts well.
I ordered my Easysprout and seeds from The Sprout people. http://www.sproutpeople.com/
They offer a great selection of sprout products and seeds.

1. Rinse your seeds until the water runs clear.
2. Soak seeds in your jar or sprouter for 12 hours

Day one-soaking
3. Drain well--very well and let sit out of sunlight

Day 2-rinsed 2 times
4. Rinse every 8-12 hours and drain well for the next 4-6 days

That is it. So easy! If you want to get the hulls off, just soak sprouts in a bowl full of water. Break up mass of sprouts and skim hulls off of top. Drain and let dry before putting into fridge. Make sure they are very dry! There you have it--a fresh nutritious green sprout in just 4-6 days.
Hope you are inspired to try this easy way of providing fresh greens for your family!
Blessings,

Subscribe to:
Posts (Atom)