I hope everyone had a great Thanksgiving! My family sure did. It could only have been better if my#2 son was home from Spain. Just 24 days and counting! I do miss him so!
I have tried to update my blog to a Christmas theme but to no avail. Blogger is letting me down today! I'll try again tomorrow! Anyone else having trouble changing layouts, and page colors?
Blogger Blessings,
Lisa
Sunday, November 25, 2012
Monday, November 19, 2012
Diabetics Holiday Survival Guide-Recipe

My biggest problem in life is that I like
to eat! I mean, I love to eat! If you have seen pics of me, it is obvious
that I love to eat! Our family
gatherings revolve around food—right or wrong-- that is how it is and probably
always will be. So in order to control my diabetes, I make substitutions so I
do not feel deprived—because deprivation is depressing and I do not want to be
any more depressed than I already am!! J
I am allowed to poke fun at myself, but I digress. So, here is a recipe that I
adapted from the Philly 3 step cheesecake recipe—my old go to cheesecake
recipe. I have eliminated the carbs from the typical crust-substituted nuts and
a Tbls. of Flour instead. (Think easy bisquick no crust pies)I have used Splenda
to replace the sugar. I do not know the exact exchange but this is a much
better option for diabetics.
Lisa’s Low Carb Cheesecake
4- 8oz. pkgs. Cream Cheese
1 ½ cup Splenda
1 tsp. vanilla
4 eggs
1 heaping Tblsp. Of flour
3/4 cup finely chopped nuts—your
choice—pecans, almonds or walnuts
Mix all ingredients except nuts in a
mixer—do not over mix.
Spray a 10 inch springform pan with Pam or
other cooking spray.
Pour finely chopped nuts into pan and shake to cover
entire bottom and half way up the sides of the pan. Then pour cheesecake mix into pan. Tap to get air bubbles out and bake for 55-60
minutes on 350 degrees. Turn off oven and crack door (leave cheesecake in oven)
until cool. Refrigerate. Serve with fresh berries and lite whipped topping.
No
one could feel deprived eating this!
I hope you enjoy this low carb cheesecake
as much as I do!
Yummy Blessings,
Lisa
Friday, November 16, 2012
Diabetics Holiday Survival Tips and Recipes
For most of the last year I have not been dealing with my diabetes. Heck, I haven't dealt with it properly for years now. I have buried my head in the sand way too long for too many reasons, mainly depression. Well, I received my wake up call a week ago. I now have mild kidney damage. To keep the damage to a minimum, I need to eat right, monitor my blood glucose, and take my meds religously--the three things I haven't been doing. So you may be asking what that has to do with this blog--well......I want to post recipes and tips to help others with diabetes cope with the holidays and help them to not feel as deprived!
I will be offering sustitutions for some of the old standbys. Lets think of this as what we CAN HAVE, not what we CANNOT HAVE! It's hard to hear you cannot have some foods--much more positive to say what you can have! If you have friends or family members with diabetes, your thoughtfulness will be much appreciated!
Here are a few tips to start:
*Sugar free Cranberry jello can be a great sustitute for the sugary sweet cranberry sauce at Thanksgiving.
*Use crushed pineapple and juice to sweeten canned yams. Just drain the syrup from the yams and pour crushed pineapple and juice over and heat. Add Splenda to taste(optional). Sprinkle cinnamon on top!
*Instead of going to the expense of making the famed greenbean casserole, save money and carbs by just having plain greenbeans. The soup has a ton of carbs!
See.......just a few little changes and you have better options for the diabetics in your life! More tips coming soon!
Low Carb Blessings to you all,
Lisa
Wednesday, November 14, 2012
How to make Herbal Firestarters( or How to Use up Sweetgum balls)
It's getting to where most people with fireplaces are going to be using them soon if they are not already! Brrrr....the cold is really bothering me this fall. I found an idea for herbal firestarteres on Pinterest and with a modification, I made a basket of them. I Used what I have an abundance of---Sweet Gum Balls. I do not have any pinecones around so I thought the annoying sweet gum balls work just as well. Now I have a great use for the pesky sweetghum balls that are all over my front yard! Yippee!! Now I just have to pay my neice and Grandaughter to pick them up for me!!
Here are the materials needed:

 Cut one sheetof paper in half and place the herbs and sweetgum balls or pinecones on the end closest to you. Roll up tightly and tie ends with string or hemp. I personally think the hemp string would be just adorable but I didn't want to buy hemp so I used what I had available--crochet cotton.


Here are the materials needed:

Fresh herbs--I cut rosemary and thyme.
String or Hemp rope
Sweetgum Balls(seed pods)
Newspaper-not the shiny ads
Scissors

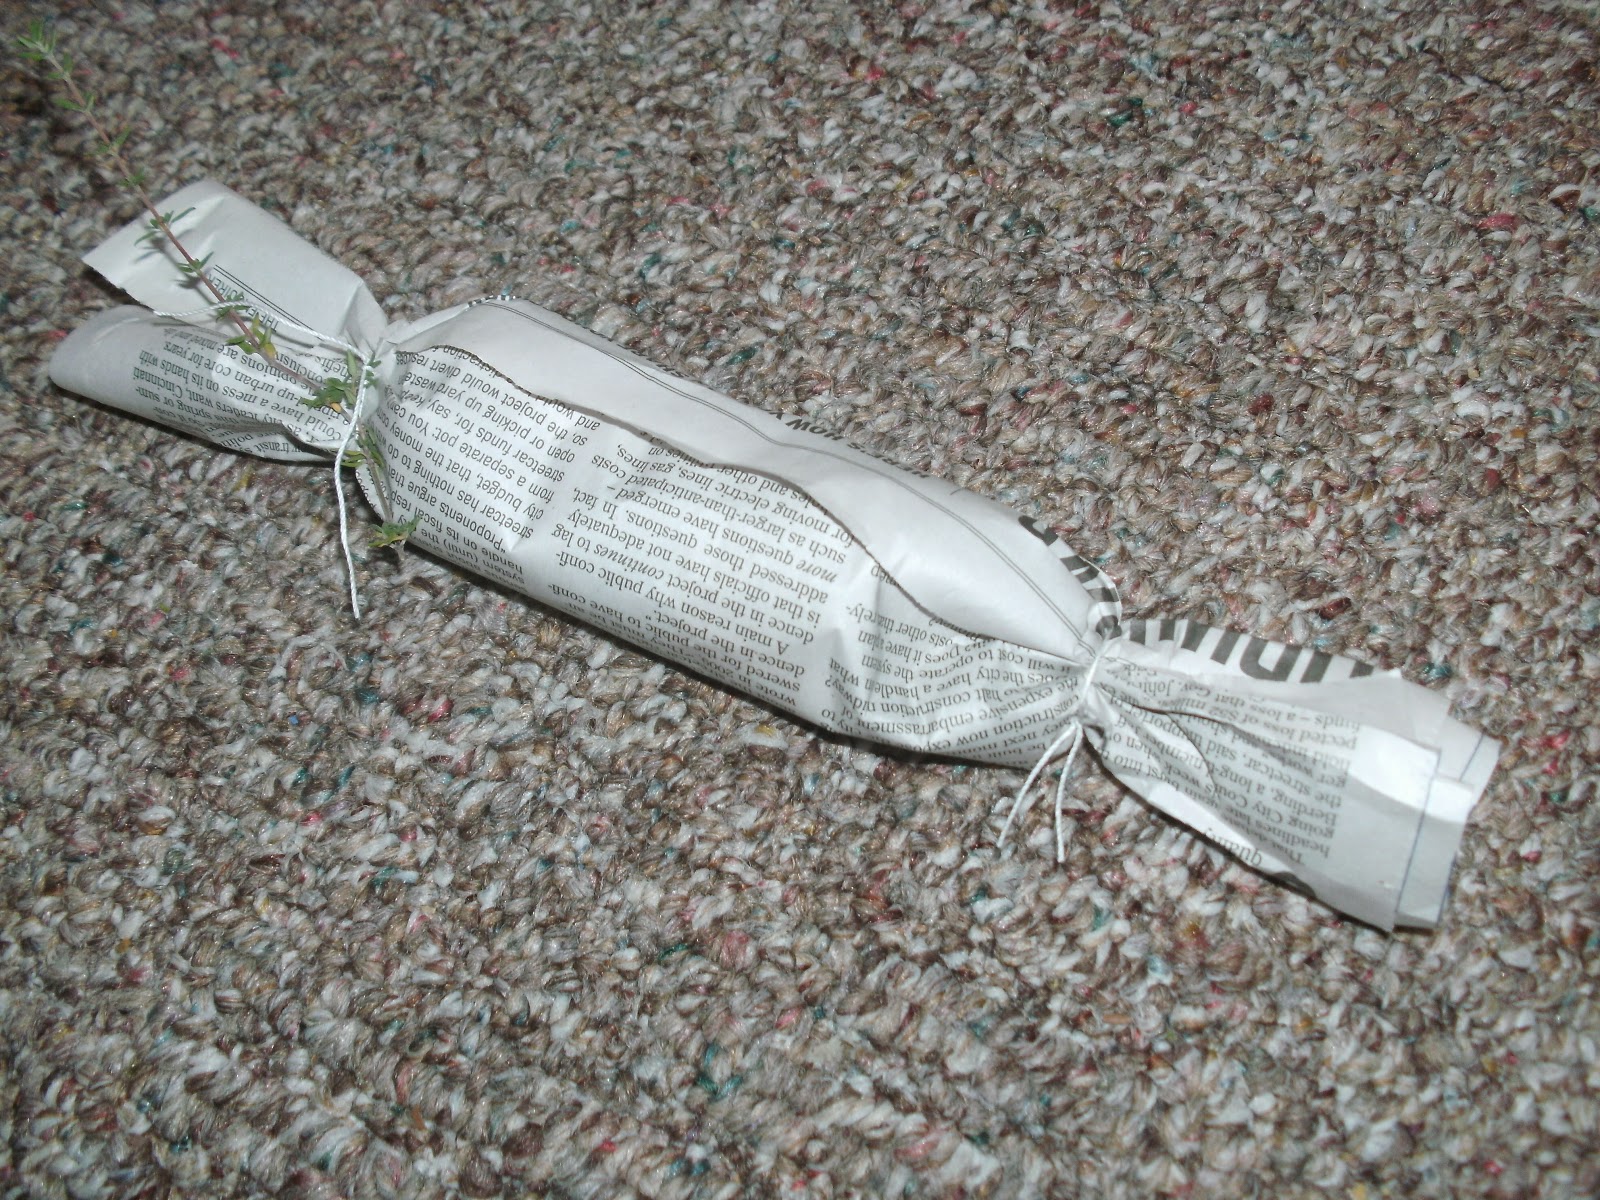
It's hard to see in this pic but I inserted a piece of herb into the one end tie. Adds a little interest!
Here is the basket of firestarters that I made this evening. Only took a little while and is so aromatic.

Even my Hubby thought they smelled nice!
Remember you can use any herb or cinnamon sticks. If you are lucky enough not to have a sweetgum tree in your front yard, you can use small pinecones or even dried twigs. What kind of firestarters do you use?
Warm Blessings to you all,
Lisa
Monday, November 12, 2012
Propagaing a Christmas Cactus

Several years ago, my Mom bought one for me for Christmas because she knew I had always admired them. I couldn't justify spending money on a plant for myself though--money was tight. The blooms were so pretty and festive through the winter that I wanted more of the Cacti for my home. My Mom told me how my Grandma used to just break off a piece and let it dry out a day or two then plant the piece in another pot. She would always have "starts" for anyone who wanted one! Both of my Grandmas had green thumbs--guess that is where I get it from--at least that is what my Mom tells me!
So here are pics of my propagating process:

Several of my Christmas Cacti in the kitchen window. The one on the left is the original one my Momma bought for me. I just counted and I have 9 pots of these beauties in my kitchen and dining room! Told you I love them! :)


Then plant several pieces in a pot together. Water lightly at first and just water once or twice a week after that. The segments may wilt a little but be patient. Less watering is more!
So if you are lucky enought to have one of these beautiful plants, you can easily propagate more. More for your home or like me, more to give away or sell!
Have you propagated any plants lately?
Blooming Blessings,
Lisa
Sunday, November 11, 2012
Deal of the Week
 My local grocery had 2 crates of pie pumpkins on sale for 50 cents each!! Guess what I am going to be doing? You guessed it.....making pumpkin puree and pumpkin butter!
These will make some awesome pumpkin pies and pumpkin butter is like fall in a jar! Yummy!
Autumn Blessings,
Lisa
Ps. I you want to learn an easy way to ,make the pumpkin puree see this page: http://herbandbotanicals.blogspot.com/2011/11/pumpkin-puree.html
Saturday, November 10, 2012
Dill--Herb of the Week!
Dill, a
plant that hails from the Mediterranean and South Russia, is a very easy herb
to grow in the home garden. It loves nice
hot summers and lots of sunshine.
Two parts of
the dill plant can be used—the leaves (dill weed) and the seeds. The seeds are very similar to caraway
seeds. Dill is best used fresh. When
dried it loses flavor very quickly.
Dill is most
notably known for its use in making Dill Pickles in the US. It is a very
popular herb in Europe, India and Canada.
Canadians favor it to season their salmon!
I have used
dill in my pickle making and also in a few recipes. My favorite use is to sprinkle it onto my
cucumber sandwiches. Here is how I make
mine:
Cucumber sandwiches
Party Rye
Bread
Thinly
sliced cucumbers
Cream
cheese-softened
Salt and
pepper
Fresh Dill
Mix cream
cheese with a pinch of salt and pepper to taste. Spread cream cheese onto the party rye
slices. Place 1-2 cuke slices onto the bread and then sprinkle with fresh dill. You can also sprinkle with salt and pepper to your taste.
These are always a hit at showers and holidays! My children love them!
Blessings,
Lisa
Sunday, November 4, 2012
Let there be Lavender Soap!
Yesterday was a fun day of soap making with my cousin Christina. She has been wanting to learn to make soap for ages so yesterday was the day! My favorite soap recipe comes from the West Ladies--Homestead Blessings --The Art opf Soap Making. I find it very informative and the DVD is very easy to follow.
Here are some of the soapmaking supplies:

Getting all of the supplies together takes more time than it takes to make the soap! Measuring the ingredients properly is very important but the most important part of soap making is saftey. Gloves and goggles are needed and keep vinegar handy to neutralize any caustic splashes. I forgot to take pics of the process--we had such a great time!
Here are pics of the soap poured into the molds:
 I chose to put lavender on the top of my bars--Christina chose to keep hers plain.


 Lovely Lavender Soap Bars- Look for them to be on sale in three weeks!

Here are some of the soapmaking supplies:

Getting all of the supplies together takes more time than it takes to make the soap! Measuring the ingredients properly is very important but the most important part of soap making is saftey. Gloves and goggles are needed and keep vinegar handy to neutralize any caustic splashes. I forgot to take pics of the process--we had such a great time!
Here are pics of the soap poured into the molds:


After pouring the soap into the molds, you need to cover them and put a towel or blanket on to keep the soap from cooling too quickly.

Today I was able to cut the bars and now they need to cure for 3 weeks before they can be used.
Here they are:


So pretty and they smell heavenly!
Blessings,
Lisa
Thursday, November 1, 2012
Our Fall Mini Vacation
Last week My hubby and I , along with our Moms, went on a mini vacation to Lake Cumberland. We stayed in the Lure Logde and let me tell you it was gorgeous! See for yourselves!


 View from the Dining room
 5 Turkeys


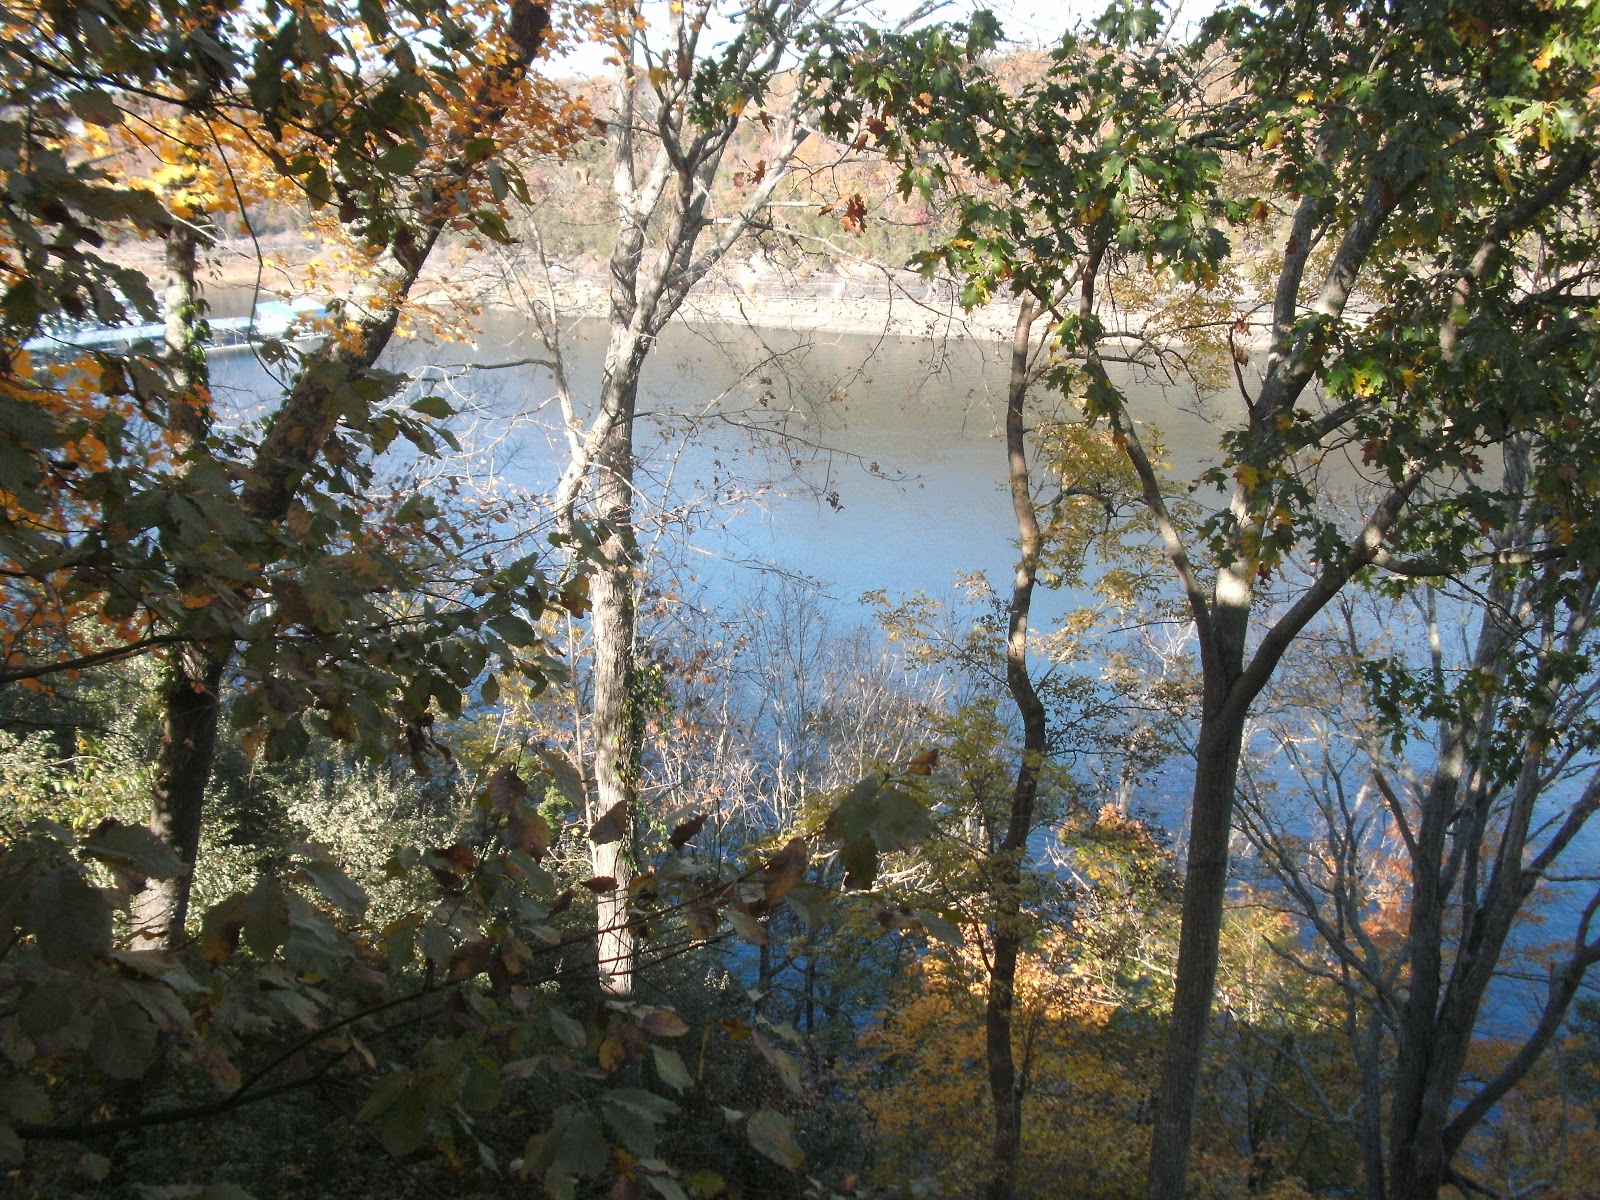
View from our balcony


Sunset
We had a wonderful,quiet 2 day stay!
Fall Blessings,
Lisa
Easy Pumpkin Pie Spice-Revisited
This is a post on making your own pumpkin pie spice that I published last year but I felt it is relevant for this time of the year! So Here it is:

If you are like me, you hate to buy the spice blends--especially since you probably have most of the spices on hand anyway. Pumpkin Pie spice is one of the most popular spice blends and is soooo easy to make your own!
Here is my recipe for it:
Just put all in a bowl and mix. Put in a small lidded jar to store!
Voila...its done! Don't forget to label it!
Have a great day!
Fall Blessings,
Fall Blessings,
Lisa
Subscribe to:
Posts (Atom)